Sunday, September 30, 2018

Festive Farmhouse

I am so excited about the suites in the Stampin' Up! catalog! One of my favorites is Festive Farmhouse.


Aren't these some beautiful samples? I have made a few samples myself. Check them out:


These are only just a couple of samples I have  made with this fabulous suite! Are they just lovely? 

Check out all the products in the suite below and click on them to purchase them for yourself. You definitely won't be sorry. Let me know how I can help you purchase these items or how to use them!


Saturday, September 29, 2018

Lily Pad Lake

Hello stampers! I hope you are well today. I have to say, I am so ready for fall to get here. It has been pretty nice here, but it is still too hot for me. The weatherman says it is supposed to rain here all next week. I will believe it when I see it, but if it does, I will be in heaven! Fingers crossed!

I have a card to share with you today. It makes me long for sandy beaches and crashing waves on the shore. That sounds so relaxing right now!


I saw a sketch last week that inspired this card. You know what though? I can't for the life of me remember where I saw it! It was for a sketch challenge, but I didn't get it ready in time, but I still wanted to share it with you as I really liked how this turned out.

I did an ombre-type technique with my waves. I used the Lakefront Framelits and cut out my card stock and then used only part of the die cut paper to makes waves up my card front. I added a few boats in the water and that's it. I probably should have made a sunset sky now that I'm looking at the card. My sun looks like it is setting. Hmm... I think I still like it. :) 


On the inside I used the water stamp from "Lily Pad Lake" and stamped it once at the bottom and then stamped again, three times up the page without re-inking. I really like the look! I took one of the boats left over from the front and placed it in my waves. I added the sentiment and this card is done. 

I have to say, I really love the font used in this set. I also really like the sentiments. Sometimes it is hard to come up with the right words for some situations and this stamp set, "Lily Pad Lake" has some great sentiments that say just the right thing.

I hope my card has inspired you today. Adios, until next time!

Yes, I just said, "Adios!" I have started taking a Spanish class with my sister-in-law. I took Spanish for two years in high school and really enjoyed it.  I have been wanting to take classes, but just haven't done it yet. I finally bit the bullet and my SIL wanted to do it also! We are having such a great time. It has been fun polishing up my skills and remembering things. I still have a long way to go, but I am so excited! Wish me luck!


Thursday, September 27, 2018

Trick or Tweet

Hello stampers! How are you today? I hope you are well. I am so excited to show my card with you today! I made some plaid card stock using my Buffalo Check Clear Mount Stamp and some markers. I am probably one of the last people to try this, but I am so glad that I did! It turned out so cute! Here is my card:


Isn't this too cute?!?!?! I used the sketch over at The Paper Players. Here is the sketch:


Isn't this a great sketch? Anyways, back to my card:


I just love the stamp set "Trick or Tweet". It has the cutest little critters in it. I have used this set a few times and have used some of
the different animals and they are all so adorable. 

I am totally diggin' the plaid "DSP". I made my own background paper using white card stock, the "Buffalo Check" stamp set and some SU! markers. Here is a close up of the plaid:


Here is how I did this: I put my large, Buffalo Check stamp on a plate of the Stamparatus. I put my card stock in the corner of the Stamparatus and inked up the check with Granny Apple Green ink. I then stamped the image onto my card stock. I had to re-ink the stamp and stamp it a second time as I wanted to get a really good image. I then took the brush tip of a Gorgeous Grape marker and a ruler and drew lines as you can see above. I then took a Pumpkin Pie marker and used the skinny end (writing tip) and drew thin lines in the middle of the white squares. I just LOVE how it turned out! So stinkin' cute!!!


I stamped my kitten with Memento Black in and colored it with Blends markers. I then cut my kitten out with the Stitched Labels Framelits and mounted it on a Gorgeous Grape Scallop Circle cut with the Layering Circles Framelits. I put a little Silver Metallic Thread behind my circle and adhered it to my card front. It is a little hard to see, but if you look closely, you can see that I used the Subtle Dynamic TIEF on the black card stock. I thought it added a little something to an otherwise plain piece.


I wanted to decorate the inside of my card. I used a sentiment from "Trick or Tweet", but didn't really have any small Halloween stamp sets. I then remembered that I have the September Paper Pumpkin! I used the little stamps from that! So cute! I love that you can use Paper Pumpkin stamp sets for other cards.

I hope I have inspired you to go create a little something pretty. I look forward to sharing with you next time!


Wishing You Well with the Ladies

Hello everyone! How are you today? Well, I hope. It has been a lovely week here. We have been in the low 90's this week so far and I am loving that it finally cools off in the evening and is much cooler in the mornings. I can't wait until it gets much cooler and we can start wearing sweatshirts and sweaters. We are headed into one of my favorite parts of the year and I am excited!!!

I am sharing a card with you today that we made at September's Card Class. The very first set that I bought from the Holiday Catalog was "Wishing You Well". I just loved the beautiful, delicate images and the sweet sentiments with the lovely font. You can't loose with this set. It can be used for multiple occasions depending on the sentiment you use with it. Let me show you what I mean:


I took my color palette from this gorgeous DSP:


Isn't this such a great color combination? I love the inspiration that our Designer Series Paper gives us. They have such great color combos, you can't go wrong when trying to figure out what colors would look good together. 


I wanted to use this fabulous DSP on my card today. It is our Frosted Floral Specialty DSP. Each piece of paper has some shimmer to it making it just elegant and lovely. Perfect for winter, wedding, and any other occasion cards. 


Can't you see the shimmer in the paper and the bow? Isn't that just gorgeous? I used the Wink of Stella on the bow. 

I paired a small strip of DSP with the "Wishing You Well" stamp set.  I wanted to make a Bridal Shower card as I like to have a few on hand, but noticed I don't have any! I thought this would also be perfect for a class as it is easy, but very pretty also. We stamped the "bouquet" in Smoky Slate and the flowers in Tranquil Tide. I then had everyone stamp the bow on a separate piece of paper with Tranquil Tide ink and color it in with Clear Wink of Stella. I love how the Wink of Stella blends the ink slightly and adds some shimmer at the same time. We cut out the bow and adhered it using dimensionals. 

We used the Tufted TIEF for the base of the card. It just adds a little something to an otherwise plain background without overpowering the card.  We used  a sentiment from another stamp set to make this a bridal card and I think it turned out just lovely. Very easy, but elegant at the same time. It was a hit with the ladies at class. Now that I am looking at it, it could use a rhinestone or two or three! I may just have to go add some and see how I like it. Otherwise, I really like how this turned out. 


On the inside we added a sentiment and a little washi tape (Sorry, this is retired!) and this card is done!

I would love to see how you use this stamp set. Please share with me using my email: mindyclove75@gmail.com. 

I hope I have inspired you to go and make something beautiful today!


Tuesday, September 25, 2018

Good looking Hand Stamped Baubles? I'm not too sure.

Hello everyone! I hope your day is fabulous so far! The hubby and I had a nice relaxing weekend and the kids were busy with friends. My week is going great so far. It would be even better if it were the weekend! Lol!

I want to share a card with you today. I had high hopes for this card. It looked so gorgeous in my head and when I got it all onto paper, it wasn't how I had imagined it. Does that ever happen to you? It does to me. Probably more often than I would like!  

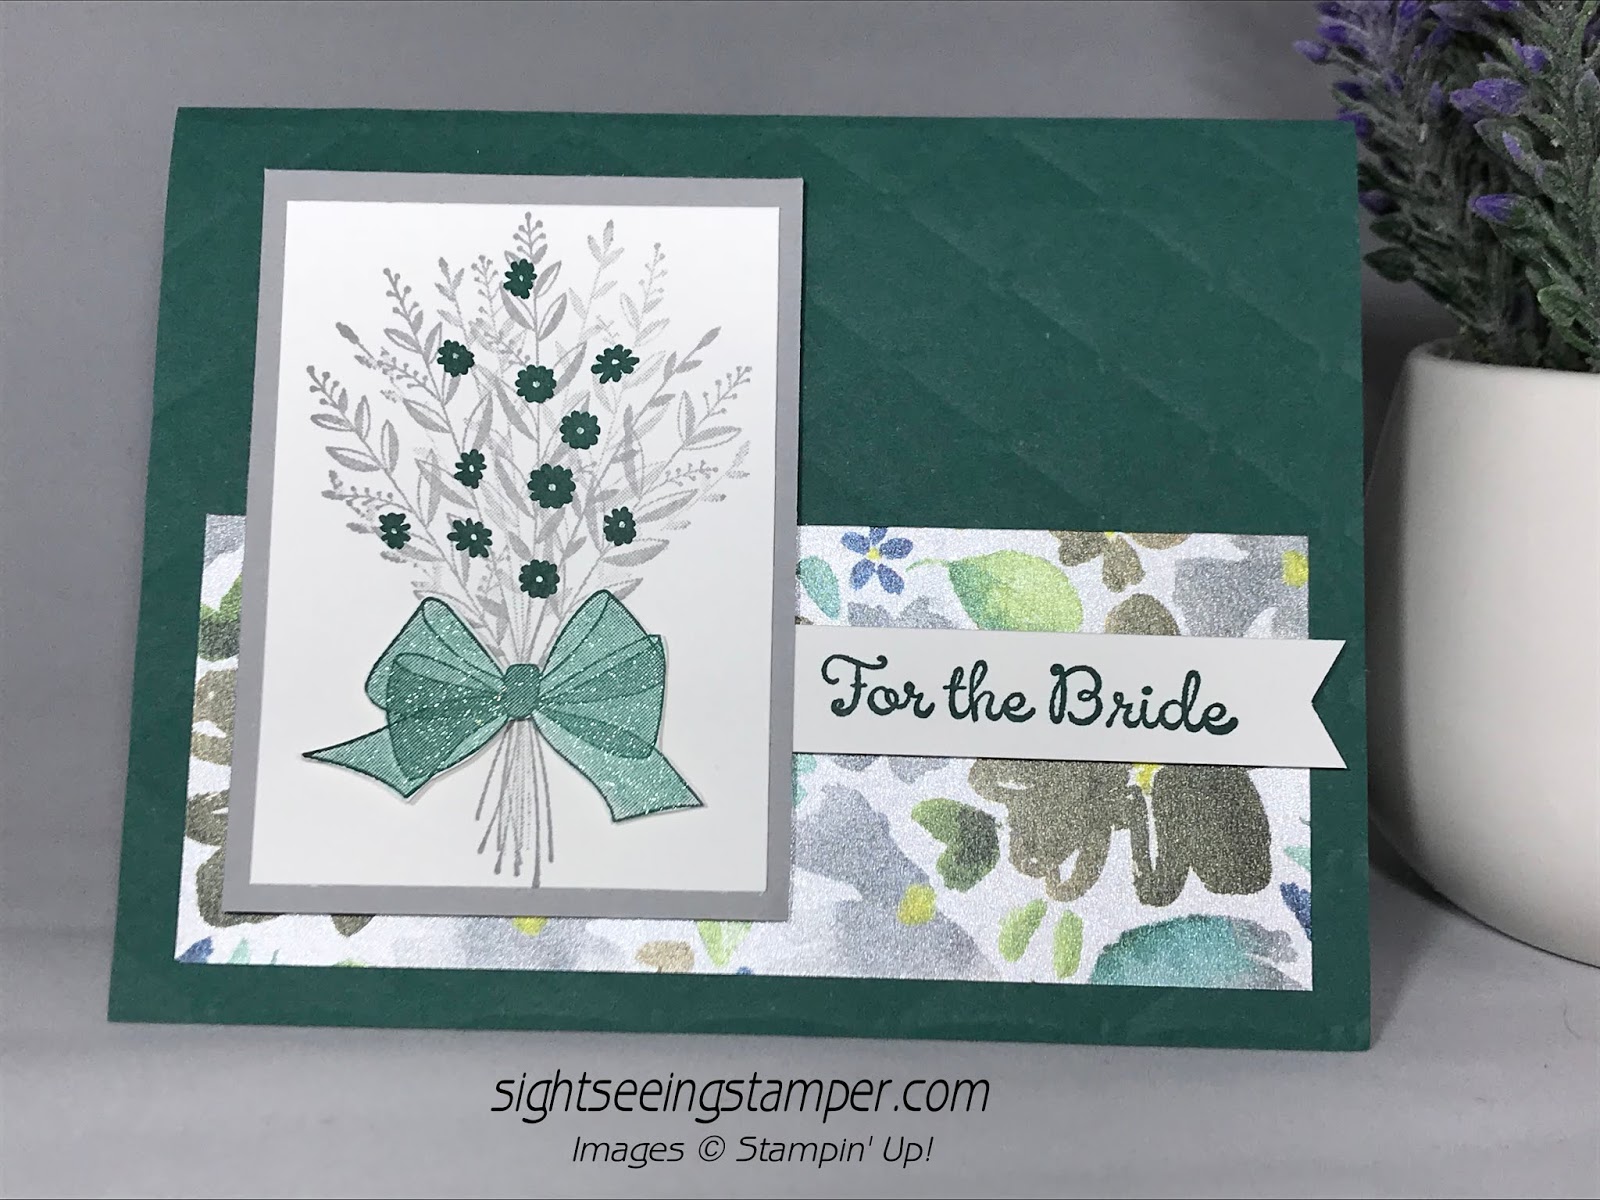
Anyways, I decided to share it with you so that you can see that not all things go as planned, but there is still something good about it and worth sharing with others. Let's see what you think:


I used a sketch from Hand Stamped Sentiments Sketch Challenge #298. Here is the sketch:


I did not enter this into their challenge. I wasn't too sure about it, but I really liked the sketch. As I said earlier in this post, I had an idea in my head and it just didn't turn out how I thought it would.


I just love this ornament from "Beautiful Baubles". This is a new set in the Holiday Catalog. Isn't this ornament just gorgeous? I have used this on a couple of projects and I am loving it every time I use it. I will show you this darling gift card holder I made with this set for Stampin' Up's! OnStage in November after I have swapped it. Anyways, I love the copper embossing of the ornament. I watercolored the ornament with my Aqua Painter and ink pads. I think it helps the copper in the DSP really stand out. 

Before I go on, let me share my color palette with you quickly:


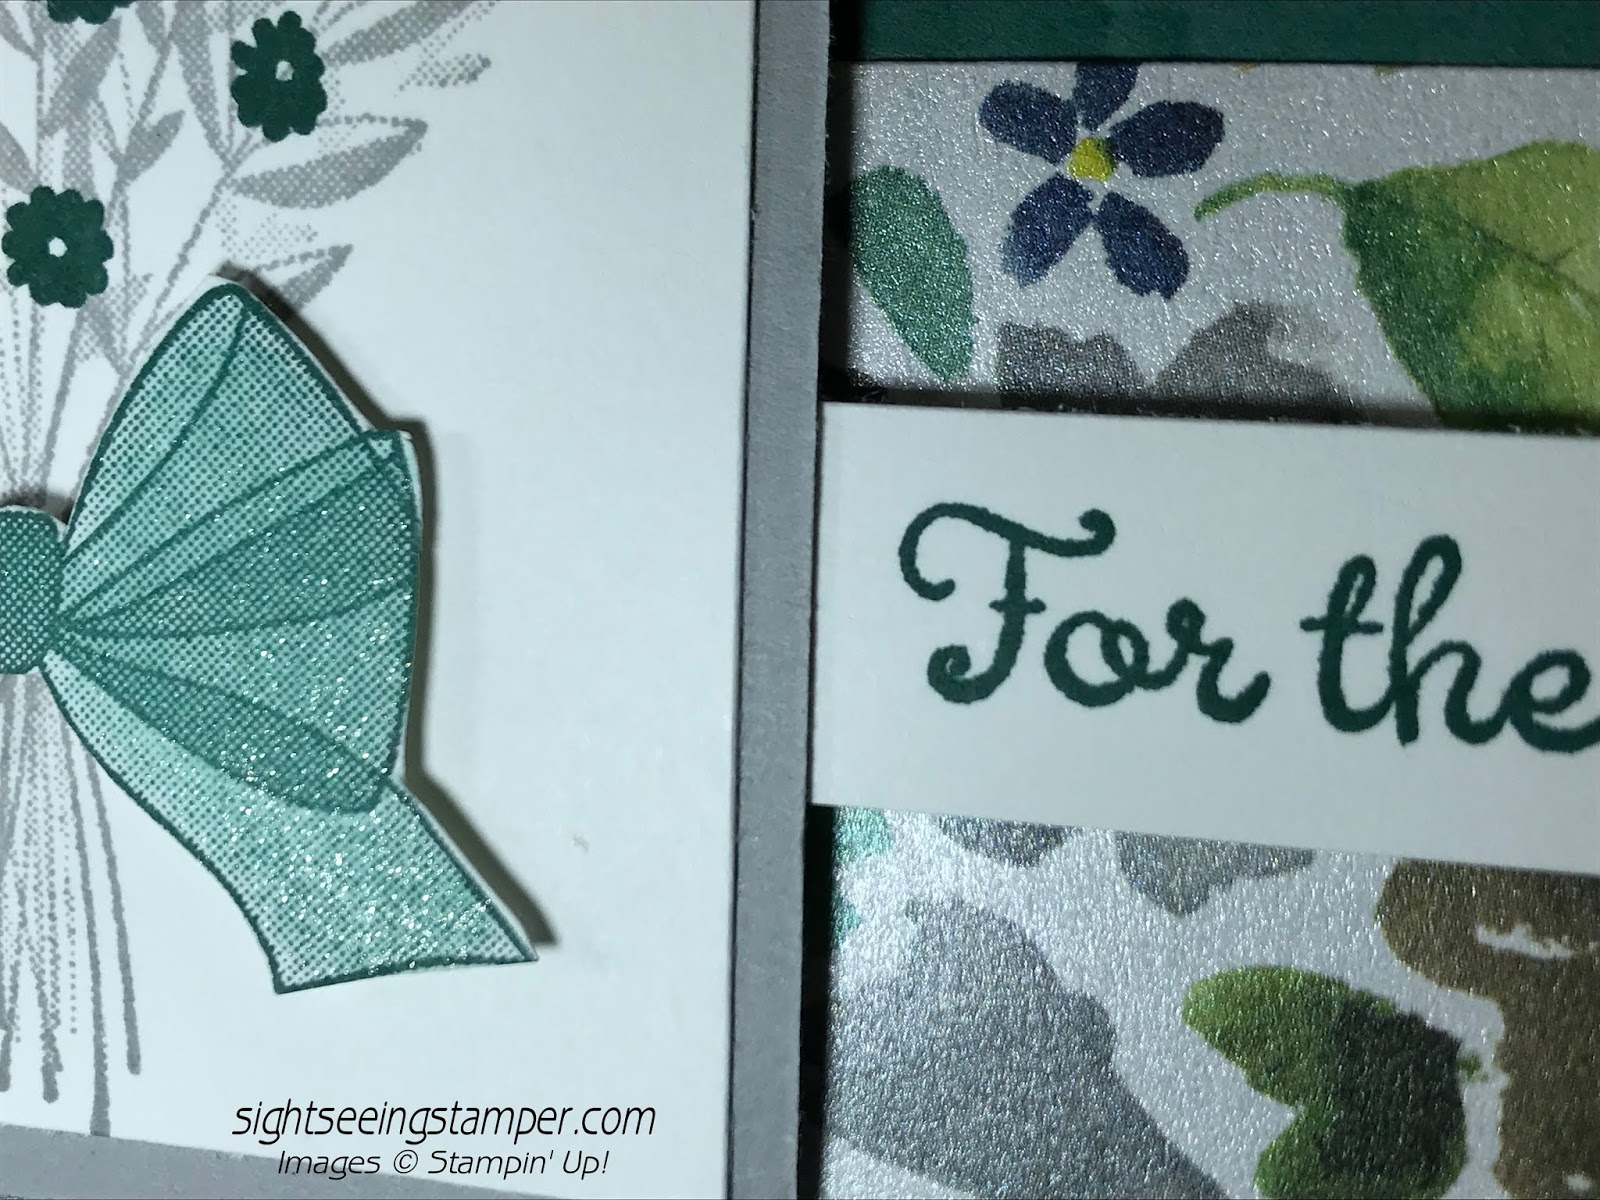
Isn't that shine just lovely? I just love the copper with these rich colors. I added a little sprig from the Frosted Bouquet Framelits to keep with the sketch and fill that empty space. I also used the Subtle TIEF on the Gray Granite card stock to add some dimension. I think the thing that is throwing me is the top of that ornament. It is missing the top! I mostly covered it with this gorgeous, soft twine and it is making my ornament look frumpy or off or something. Maybe that is what it is. 


I kept the inside very simple, but added a nice sentiment and a little stamping to make it pretty.


What do you think? I would love to hear your thoughts on my card. (Just don't be too brutal! :))  I hope that you continue creating even when something doesn't go quite as you thought it would. That is how we grow as a creators, through patience and perseverance! 

So I thought I'd share a little of what is going on with me lately real quick. We are going to start building our new house very soon! We have been waiting anxiously and the permits from the city should be ready any day now. We are so very excited, but hesitant for this journey. I have heard that building can be very stressful! So many choices and decisions to make, but I am ready to hit things head on! I can do this! 

We are building in the same town of St. George, Utah, just across town from where we are now. We just love it here and have no plans to ever go anywhere else. Granted, the summers are brutally hot, but the rest of the year is just wonderful. I will let you know when they start digging the hole and how things go. Wish us luck!


Sunday, September 23, 2018

A Freshly Made Farmhouse!

Hello everyone! I hope you are having a nice and relaxing Sunday. I am so excited to share my card with you today! I just love the stamp set that I used and I am loving the sketch. Here is my card:


Here is the sketch:


Isn't this a great sketch? When I first saw it, I was very intimidated, but once I started looking at my stamps, I realized that by using "Farmhouse Christmas", you can build a fun scene. Perfect for this sketch! I turned the sketch on its side and away I went!

 But first, let me share my color palette with you quickly:


I love the "Farmhouse Christmas" bundle. It is such a darling set with cute images and wonderful sentiments and coordinating dies. I have used this stamp set before, but haven't inked up this cute little house and tree. I used the Wood Textures 6 x 6 DSP to make the tree look realistic. I think it looks so cool! Very real! I am also LOVING this gate die. How adorable is that?!?!  I am so in love with this bundle. This should be a must have on everyone's list. (Unless you have it already, if so, bravo!) I used my blends to color in my house. I love how well they shade and blend. 


Don't you love my cloudy sky? Here's what I did to make it: I cut out a large cloud using the Up and Away thinlits. I am so glad I remembered I had these. I then put the cloud down on my vanilla card stock and took a sponge dauber and Smoky Slate ink and sponged around just the top of the cloud. I then moved it around and sponged until I had a nice, little cloudy sky. So cute! I cut a curvy line at the bottom of my sky and glued it down to a piece of Mossy Meadow card stock. That way it looks like the sky meeting the ground. 

I adhered my tree, fence and house to the front of my card. I then used the dies to cut out the darling, little bows and wreath, adhered them and my cozy, little scene was done. So much fun!


I couldn't leave the inside blank so I added a sentiment and this cute, little truck from the same stamp set. I colored the truck with my blends and there you have a wonderful card to give to someone special during the holidays! 

I am so glad that you joined me today. I hope you enjoy this card as much as I do. Happy stamping!


Saturday, September 22, 2018

CASEing Kerstin around the Globe

Hello everyone! I hope you are having a wonderful weekend! It has been quiet for my hubby and I as the kids are hanging out with friends. It is giving us a taste of what it will be like being empty-nesters. I'm not sure how I feel about that.

Anyways, I want to share a card with you today. I am playing along with the Global Design Project with today's card.


Here is what inspired my card:


Isn't this a lovely card done by Kerstin Kreis? I just love it. So pretty. In playing along with this week's challenge, we are supposed to CASE the Designer. CASE means, Copy And Selectively Edit. I fear I may have CASEd her a little too closely, but I hope that is okay. 


I really liked Kerstin's card in that it had a lot of "white space". It is such a clean and elegant look. I recreated the embossed background by cutting out some flowers from our gorgeous "Delightfully Detailed" Laser-Cut Specialty Paper. It is so pretty! I glued it to my white card in the center. 

I also loved Kerstin's color palette. Here are the colors I also used for my card:


Isn't this a lovely palette? I used the "First Frost" stamp set and stamped the flowers and leaves on scratch paper and cut them out with the coordinating "Frosted Bouquet" framelits. I also die cut a little sprig from Mint Macaron card stock and adhered all the pieces to the front of the card.


If you look closely at the top of the card, you will see some little x's that are cut into the cardstock. I used the "Stitched Labels" framelits. I also used these framelits to "frame" my sentiment on the front.  I just love these framelits! I use them all the time. This is a must have product from the 2018-2019 Annual Catalog.


I stamped a greeting from the "First Frost" stamp set and some greenery and a flower for the inside and this card is done. I really like how it turned out. Thanks Kerstin for a beautiful card to inspire us!


Monday, September 17, 2018

Clearance Rack Updated!

I wanted to let you know that Stampin' Up has just updated their Clearance Rack! You can get products for up to 60% off! That is a steal! You should check it out before supplies run out. Click on the link below to see all the products.

CLEARANCE RACK UPDATE


Clearance Rack


These are only a few of the products that are available. Check out all the products on clearance here:


Don't forget, these are only while supplies last so get yours now!


Friday, September 14, 2018

Fancy Santa

Hello everyone! It's Friday! WooHoo! Happy day.

I have a cute card for you today. I used the September Technique Challenge from Try Stampin' on Tuesday.

Here is the Challenge:


Try Stampin' On Tuesday

You can use any Fancy Fold. I did an accordion type fold. I guess I'm not sure exactly what it's called. Sorry! Here is my card:


I just love this Santa! Isn't he adorable? I wasn't going to get this stamp bundle, but I have seen too many cute samples made with it, that I caved in and bought it and I am not sorry one bit! Lol!

Here is the color palette that I used:


I love these traditional Christmas colors. 


I used some super cute Designer Series Paper. It is called "Dashing Along". You can earn it for FREE when you host a Stampin' Up party in the month of September with a total sales of $250.00 or more. Isn't that awesome? If you would like to host a party, I would love to be your demonstrator. Just send me an email to mindyclove75@gmail.com, and I can get one going for you. If you are not local, St. George, UT, I can do a Facebook party for you!


My card has a traditional inside like most regular cards. I stamped Mrs. Claus here. Isn't she just sweet looking? I think she is adorable.

The fun fold of my card is on the front.


This little panel on the front of the card folds out after you untie the ribbon. How cute is that?


Here is a look at it flat and laying down. Aren't those images darling? I also love the sentiments in this set. Don't you just love the lovely patterns on this DSP? I do! They are so fun and festive.

I used my Softly Falling Textured Impressions Embossing Folder to emboss the green panel. It  needed a little texture on it as it looked a little plain. 

I hope you liked my fun fold card today. I love fun folds! I hope you try some out and share them with me. 


Monday, September 10, 2018

"Spooktacular" Design

Hello stampers! Happy Monday! I hope you had a great weekend. We did. It was really nice. My son had a great time at Homecoming. His date is such a cute, sweet girl.

Anyways, I have a card for you today! They have a wonderful sketch over at Global Design Project. I just had to try and make a card for it. Here is the sketch:


Global Design Project


And here is my card:


Isn't this puppy so adorable? There are the cutest, little animals in the "Trick or Tweet" stamp set. I actually am a cat person, but I wanted my animal to be facing right and the kitty in this stamp set faces left. Weird, I know, but I do think he is adorable. Here is the color palette that I used:


These are some new colors in Stampin' Up!'s color revamp. I just love them! They are so bright and cheery. I have used Granny Apple Green several times, but haven't used Gorgeous Grape yet. I absolutely love it, but have been a bit unsure of where to use it. This card is perfect for it.


I used the "Oh My Stars" embossing folder to jazz up the background of my card. I also used some of this yummy, stripped ribbon. This was one of the first embellishments that I bought when the catalog came out, but this is the first time using it! Crazy! I punched a small hole in the seam of my card for the ribbon to slide through.

I used some 6 x 6 DSP for a little pop of color and some Blends to color my little pooch.  I just love these markers! They make blending so easy and make your coloring look professional.


I added a sentiment and a little birdie on the inside to finish off my card. Cute!

I hope I have inspired you today to go and create something "spooktacular" of your own. 


Sunday, September 9, 2018

Frosted Floral Wedding

Hello there stampers! How are you today? I hope you are feeling a bit crafty and are ready to create something. I have a lovely card for you today. I was inspired by a sketch over at Paper Craft Crew Challenges. I was so excited to pull out my Frosted Floral Suite of products and use it for the first time. 

Here is the sketch:


Paper Craft Crew

And here is my card:


Aren't these colors just rich looking? Let me share my color palette with you quickly.


I love these colors together. So lush!


In the Holiday Catalog, there is a suite of products called "Frosted Floral". It has just the loveliest products in it. There is this fabulous DSP that is printed on shimmery white paper. You can't tell in this picture as I only used a small piece of DSP, but trust me, it's shimmery and you have to have it! 

I used the stamp set, "First Frost". It has some lovely, watercolor images and some sentiments with a lovely font. I love this set! I like being able to have that watercolor look without having to do all the work when I may not have the time. There are also some lovely dies that coordinate with this stamp set that add some texture to your card and cut out the images in the stamp set. Trust me when I say, "You are going to want the entire suite!" 

I used by Subtle TIEF for the first time on this card. If you look closely, the Merry Merlot panel has a subtle texture to it. Hence, the name "Subtle". It just adds a little touch without making things too busy.


A little somethin', somethin' on the inside and my card is done. Don't you just love those images! 

I hope I have inspired you today. Go on out and make something lovely to share with someone you love or someone who needs a pick-me-up.